Arugula is one of the easiest leafy greens to grow in an aquaponics system. It germinates fast, enjoys cool water, and delivers a first harvest roughly 35–40 days after transplant. The catch — and it is a real one — is that arugula is a cool-season crop. Run your system too warm, pair it with the wrong fish, or follow targets that don’t hold up in practice, and your crop will bolt before you get a decent cut. This guide fixes those problems directly.
Key Takeaways
- Temperature: Keep water at 65–72°F (18–22°C). Arugula bolts above roughly 75°F — which rules out tilapia, the most commonly recommended aquaponics fish, as a practical partner for this crop.
- Water chemistry targets: pH 6.0–6.8, total ammonia nitrogen (TAN) under 1 ppm, nitrite under 1 ppm, nitrate 20–80 ppm. These are the standard targets for a functioning aquaponics nitrogen cycle, based on FAO guidelines and UVI research.
- Realistic harvest timeline: First cut at 35–40 days after transplant. Cut-and-come-again regrowth takes 2–3 weeks — not the 7–10 days occasionally cited, which is not achievable under normal aquaponics conditions.
- Starter setup: A 20-gallon fish tank paired with a 10-gallon media grow bed and a 100–150 GPH pump is a practical, manageable place to begin. If you own a larger pump, throttle it with a ball valve rather than replacing it.
Why Is Arugula Such a Good Match for Aquaponics?
Arugula belongs to the brassica family and has naturally modest nutrient requirements compared to fruiting crops like tomatoes or cucumbers. That makes it a forgiving crop for aquaponics beginners who are still dialling in their nitrogen cycle. You don’t need a dense, mature fish population to sustain it — a small school of goldfish in a 20-gallon tank produces more than enough ammonia (which the system’s bacteria convert to nitrate) to fuel a 10-gallon grow bed of arugula at full planting density.
The other advantage is speed. Arugula germinates in 5–7 days at the right temperature and reaches harvestable size faster than most aquaponics crops. That quick feedback loop is useful when you’re learning. You can see the results of your water chemistry decisions within weeks rather than months. If something is off — pH drifting low, nitrate too thin, temperature creeping up — the leaves signal the problem quickly and you can adjust before serious damage is done.
Arugula also pairs naturally with other cool-season leafy crops. If you want to mix species in your grow bed, watercress thrives under nearly identical water parameters — the same 65–72°F temperature range and 6.0–6.8 pH target — and adds variety to your harvest without requiring any changes to the system setup. Both crops share the cool-water preference that also, conveniently, rules out some of the most common temperature-driven mistakes beginners make.
How Should You Design Your Starter Aquaponics System for Arugula?
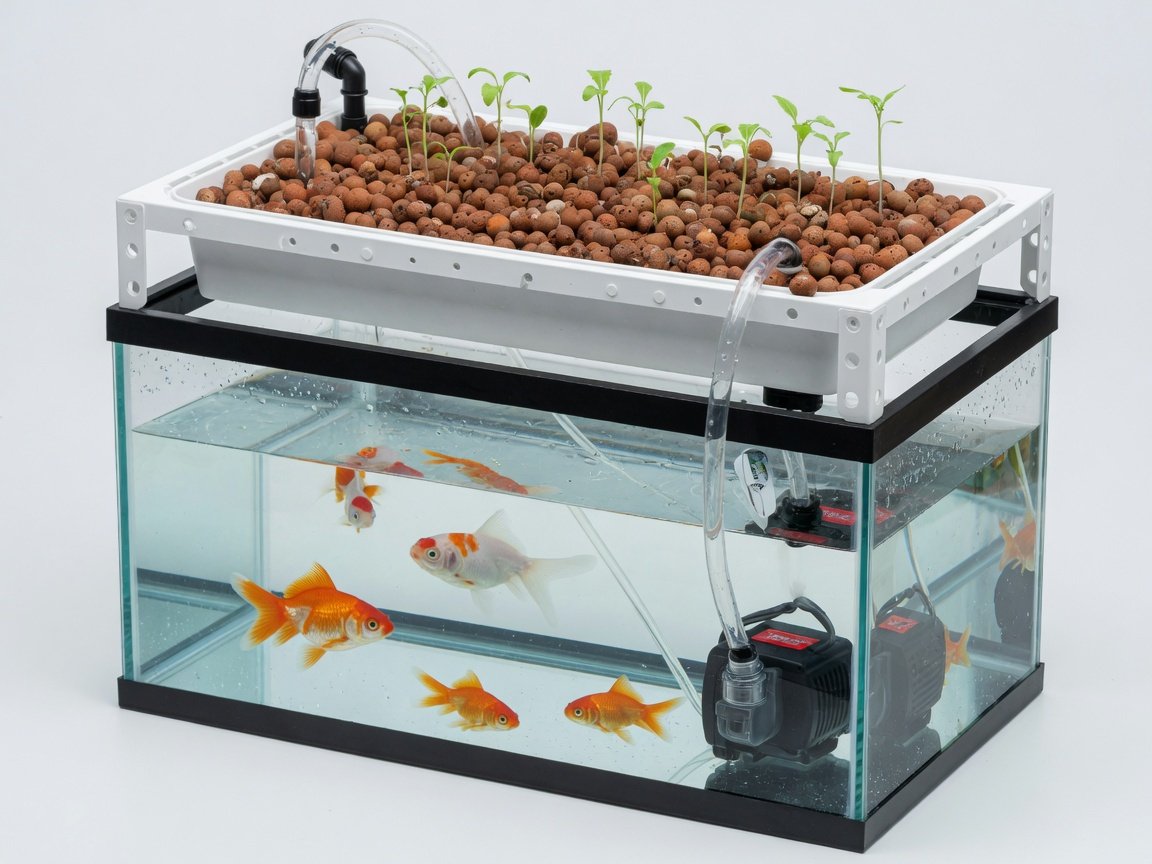
A 20-gallon fish tank paired with a 10-gallon media grow bed is a well-proportioned starting point. This 2:1 tank-to-grow-bed ratio gives the fish tank enough water volume to buffer chemistry swings while keeping the plant load within what a modest fish population can sustain. If the grow bed is too small relative to the tank, nitrate often stays low because there is too little plant mass consuming it and arugula yellows and grows slowly. Too much grow bed relative to the fish population has the opposite effect — plants strip nitrate faster than the fish can replace it.
For pump sizing on a 20-gallon starter system, a 100–150 GPH submersible pump is the right specification. That delivers 5–7 complete tank-volume turnovers per hour — enough to keep water oxygenated and nutrients circulating without generating turbulent flow that stresses arugula roots. If you already own a larger pump (300–500 GPH) from a previous setup, don’t replace it. Install a ball valve on the return line and throttle delivery to the grow bed down to 100–200 GPH. The larger pump reserves capacity for future expansion; the valve controls what actually reaches the plants right now. Getting the balance between grow bed media choice and water volume correct from the outset is just as important as pump sizing when it comes to long-term system stability.
Fill the grow bed with expanded clay pebbles to a depth of 6–8 inches. Shallower than 6 inches and arugula roots don’t anchor firmly; deeper than 8 inches adds unnecessary media weight without benefiting a shallow-rooted leafy green. Clay pebbles are the most widely used aquaponics media for good reason — they’re pH neutral, drain freely (critical for preventing root rot), and provide enormous surface area for the nitrifying bacteria that convert ammonia to nitrate. A flood-and-drain cycle using a bell siphon works well at this scale, as does continuous flow. Whichever method you use, make sure the bed drains completely between cycles to prevent anaerobic zones.
Which Fish Should You Choose for an Arugula Aquaponics System?
Fish selection is where most arugula aquaponics setups go wrong — and not through an obvious mistake, but through a temperature mismatch that seems minor until the crop bolts in three weeks. Tilapia are the default recommendation in most aquaponics content because they’re productive, fast-growing, and tolerant of variable water quality. Their preferred temperature range is 76–84°F. Arugula bolts above roughly 75°F. Those two ranges don’t overlap. An arugula system needs cool-water fish.
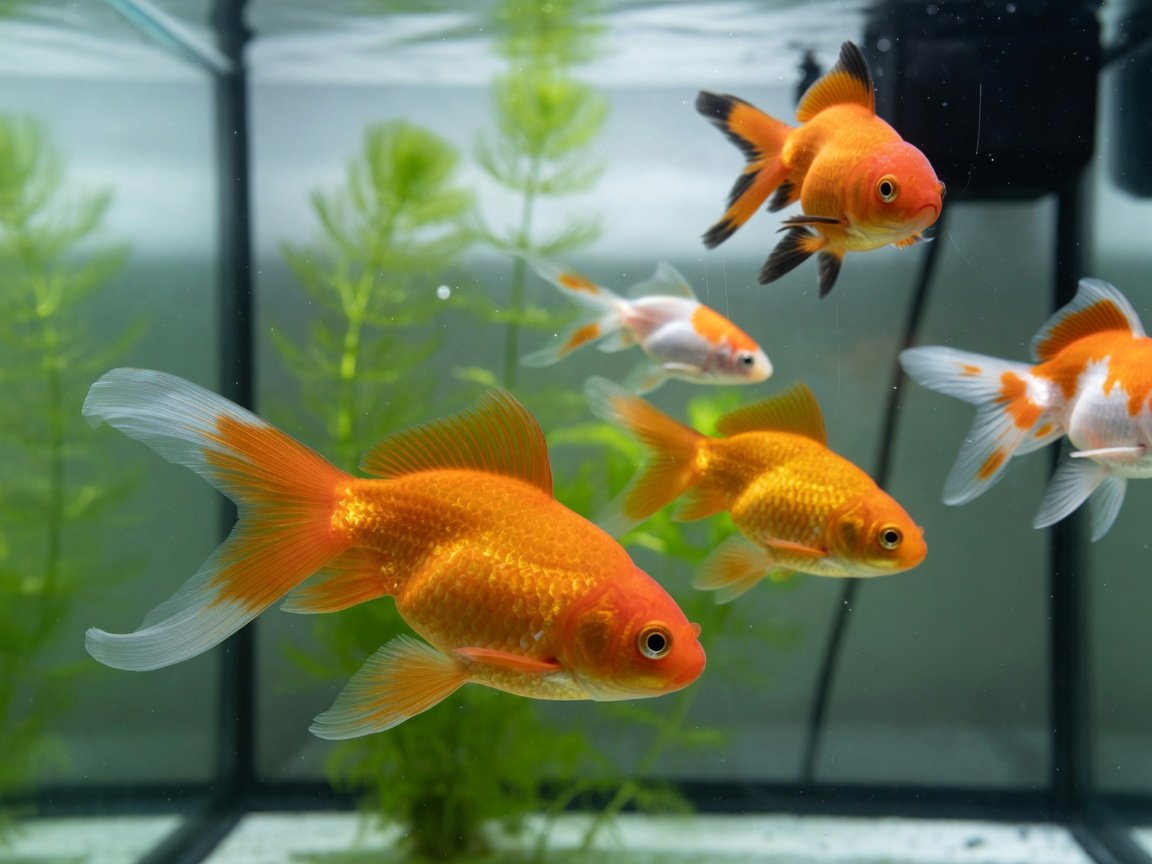
Goldfish are the best beginner choice for an arugula aquaponics system. Common goldfish and comet goldfish are hardy, comfortable at 60–75°F, and produce reliable ammonia output from standard fish food. In a 20-gallon tank, 4–6 goldfish at a light stocking density generate enough waste to fuel a 10-gallon grow bed without overloading the system. They’re also inexpensive and widely available, which makes them ideal for a first system where some trial and error is inevitable.
Rainbow trout are an excellent choice if you want an edible production fish in a cool-water setup. They prefer 50–65°F — slightly cooler than the ideal arugula range, but the 65°F overlap zone works well for both species. Trout are prolific waste producers, so nitrate supply to the grow bed is rarely limiting. The trade-off is that trout need larger, well-oxygenated tanks and are more sensitive to water quality fluctuations than goldfish. If you’re considering this route, understanding what raising rainbow trout in aquaponics involves before you commit will save significant frustration. Sunfish (bluegill) are a third option that sits comfortably in the 65–75°F zone if you want a native species with good waste output.
One category of fish to avoid entirely: small ornamental species like guppies, platies, or similar tropical fish. These are sometimes suggested for beginner tanks because they’re cheap and easy to keep, but they produce negligible waste relative to plant load. You simply cannot build sufficient nitrate with ornamental fish to sustain a productive grow bed of arugula. Stick to species with meaningful waste output — goldfish, trout, or sunfish — for a system that actually feeds its plants.
| Fish Species | Ideal Temp Range | Arugula Compatible? | Best For |
|---|---|---|---|
| Goldfish (comet/common) | 60–75°F (15–24°C) | ✅ Yes | Beginners; 20-gallon starter systems |
| Rainbow Trout | 50–65°F (10–18°C) | ✅ Yes (cooler systems) | Edible production; intermediate growers |
| Sunfish / Bluegill | 65–75°F (18–24°C) | ✅ Yes | Budget builds; mid-size systems |
| Tilapia | 76–84°F (24–29°C) | ❌ No — temperature triggers arugula bolting | Warm-water crops only (not arugula) |
| Ornamental tropicals (guppies, platies, etc.) | Varies (typically 75–82°F) | ❌ No — insufficient waste output | Decorative displays only |
How Do You Start Arugula Seeds for Aquaponics?
Arugula seeds are small and germinate reliably at 65–75°F. The most consistent method for aquaponics is to start seeds in rockwool cubes pre-soaked in pH-adjusted water (target 6.0–6.5). Sow 2–3 seeds per cube at a shallow depth of about 3–5 mm, keep the cubes moist but not saturated, and you should see germination in 5–7 days. Once seedlings are roughly an inch tall with roots beginning to emerge from the base of the cube, they’re ready for transplant into the media bed.
Direct sowing into the media bed is also possible once your system is fully cycled and stable. It’s simpler — no transplant shock, no separate germination area — but gives you less control over conditions. For a first grow, rockwool gives you higher germination rates and lets you select only the strongest seedlings before transplanting. With experience, direct sowing into clay pebbles works fine and cuts the seed-to-grow-bed timeline by a few days.
On variety selection: standard ‘Rocket’ arugula is peppery, fast-growing, and the most widely available variety — a solid default choice. ‘Astro’ is milder, slightly slower, and notably more bolt-resistant, which is useful if your system temperature tends toward the upper end of the acceptable range. ‘Sylvetta’ (wild arugula) delivers the most intense flavour and is the most bolt-resistant of the common varieties, but grows more slowly than either. A blend of ‘Rocket’ and ‘Astro’ is a practical choice for most systems — fast growth from the Rocket combined with the heat tolerance of Astro, and staggered planting turns the combination into a near-continuous harvest.
What pH and Water Chemistry Does Arugula Need in Aquaponics?
The target pH for an arugula aquaponics system is 6.0–6.8. This range satisfies the competing needs of three biological systems at once: the arugula plants (which absorb iron and micronutrients most efficiently at slightly acidic pH), the fish (which tolerate this range without stress), and the nitrifying bacteria that are the engine of the whole system. Understanding what bacteria actually do in an aquaponics system makes the pH floor easy to grasp — drop below 6.0 and you’re not just changing the plant environment, you’re suppressing the bacteria that prevent ammonia from reaching toxic levels.
A point of confusion that comes up frequently: you may see 5.5–6.8 cited as the acceptable pH range for arugula. That range applies to hydroponic arugula, where nutrients are supplied directly in solution and bacteria play no role. In aquaponics, 5.5 is too low. The nitrifying bacteria — primarily Nitrosomonas and Nitrobacter species — show significantly reduced activity below pH 6.0. In a purely hydroponic setup, 5.5 works fine because there’s no bacterial conversion step. In aquaponics, pH 6.0 is a firm lower bound, not an approximation.
Test pH daily during the cycling period (the first 4–6 weeks of a new system) and at minimum twice weekly once the cycle is established. Use a liquid test kit or a calibrated digital pH meter — paper strips are not accurate enough for reliable aquaponics management. If pH drifts below 6.0, potassium hydroxide or calcium hydroxide will raise it. If it climbs above 6.8, food-grade phosphoric acid brings it back down. In established systems, pH tends to drift slowly downward as nitrification produces nitric acid — this is normal and easy to manage with small, regular upward adjustments.
How Do You Manage Nitrogen Levels the Right Way?
The nitrogen cycle is the biological engine at the core of every aquaponics system. Fish produce ammonia through waste and gill respiration. Nitrifying bacteria convert that ammonia — first to nitrite, which is toxic to fish at elevated levels, and then to nitrate, which is the primary nitrogen source your arugula uses for growth. Your job is to keep ammonia and nitrite at safe levels while maintaining enough nitrate to sustain healthy plant growth.
The standard management targets, based on FAO Small-Scale Aquaponics Food Production guidelines and foundational research from the University of the Virgin Islands aquaponics program, are:
- Total Ammonia Nitrogen (TAN): below 1 ppm (ideally below 0.5 ppm)
- Nitrite (NO₂): below 1 ppm
- Nitrate (NO₃): 20–80 ppm — the primary available nitrogen for arugula uptake
If ammonia spikes above 1 ppm, reduce fish feeding immediately — uneaten food decomposing in the tank is a major ammonia source. A 25% water change will dilute elevated levels quickly in a small system. If nitrate climbs above 80 ppm, increase plant density, reduce feeding, or perform a partial water change. Electroconductivity (EC) provides a useful proxy reading for total dissolved nutrients: target 800–1,200 µS/cm for arugula. If EC creeps above 1,500 µS/cm, dilute with dechlorinated fresh water.
What Temperature and Lighting Does Arugula Actually Need?
Keep water temperature in the range of 65–72°F (18–22°C). This is the zone where arugula grows vigorously without bolting, and it aligns with the comfort range of goldfish, sunfish, and the warmer edge of rainbow trout’s preferred band. Arugula can tolerate brief dips to around 60°F without serious damage. Above 75°F, it redirects energy from leaf production to flowering — that’s bolting — and the leaves become bitter and tough almost immediately. The temperature range is not a suggestion; it is the dividing line between a productive crop and a wasted one.
For lighting, the evidence-based recommendation from university-level controlled-environment agriculture research is 14–16 hours of light per day, with 8–10 hours of complete darkness. You may see 18–20 hours recommended for leafy greens in some sources. That extended duration does not improve arugula yield and eliminating the dark period interferes with the plant’s respiration cycle. Use a plug-in timer to enforce a consistent schedule — inconsistent light periods contribute to erratic growth and can trigger bolting independent of temperature.
For indoor systems, full-spectrum LED grow lights are the most efficient option for arugula. A 45–65W LED panel is adequate for a 10-gallon grow bed, positioned 6–12 inches above the canopy depending on the fixture’s output intensity. T5 fluorescent fixtures also work well at close range. One important caveat: if your grow lights are generating enough heat to push water temperature above 72°F, raise the fixture, add a small fan over the water surface, or consider a compact aquarium chiller if you’re in a warm climate and cannot control ambient temperature otherwise.
How Do You Monitor and Maintain Your System Week by Week?
A consistent monitoring routine is what keeps a small aquaponics system healthy without consuming your schedule. The first 4–6 weeks — the cycling period — demand daily attention. Once the nitrogen cycle is fully established and stable, the maintenance load drops considerably. Here is a practical rhythm that covers the essentials at each stage.
Daily (5–10 Minutes)
- Confirm the pump is running and water is circulating to the grow bed
- Observe fish behaviour — active, feeding normally, no gasping at the surface
- Scan arugula leaves for yellowing, curling, pest damage, or early bolting signs
- Check water temperature — target 65–72°F
Twice Weekly
- Test pH — target 6.0–6.8; adjust if needed before it drifts further
- Test total ammonia nitrogen (TAN) — should be below 1 ppm; above this, reduce feeding immediately
- Test nitrite — should be below 1 ppm; elevated nitrite indicates an immature or stressed nitrogen cycle
Weekly
- Test nitrate — target 20–80 ppm; below 20 ppm and plants will show slow growth or yellowing
- Perform a 10–25% water change to remove accumulated solids and refresh mineral content
- Inspect grow media around the bell siphon inlet for clogging or solid build-up
- Verify pump flow is still delivering 100–200 GPH to the grow bed; re-set the ball valve if flow has drifted
Yellowing leaves are the most common visible problem in an established arugula system. They usually indicate low nitrate, pH below 6.0 locking out micronutrients, or both — test both before making any changes. Pale, spindly, elongated growth stretching toward the light means insufficient intensity or duration: move the fixture closer to the canopy or extend the daily photoperiod toward 16 hours.
When and How Should You Harvest Arugula in Aquaponics?
Under good conditions — water at 65–72°F, 14–16 hours of light daily, pH 6.0–6.8, nitrate 20–80 ppm — expect your first harvest approximately 35–40 days after transplanting seedlings into the grow bed. Arugula is ready when outer leaves reach 3–4 inches in length. At this size the flavour is peppery and fresh. Larger leaves become progressively more intense in flavour and fibrous in texture, so harvesting at 3–4 inches consistently gives the best eating quality.
Use the cut-and-come-again technique: harvest outer leaves only, leaving the central growing tip and at least half the plant mass intact. The plant redirects energy to new leaf production and will regenerate to harvestable size in approximately 2–3 weeks. A 7–10 day regrowth window is sometimes cited for arugula — that timeline is not achievable under normal aquaponics conditions at any system size. Planning around it leads to over-harvesting and progressively weakening the plant. Two to three weeks is the realistic and sustainable target between harvests.
To extend the productive life of each plant, harvest frequently and keep water temperature stable. When you notice the central stem beginning to elongate — the first sign of bolting — cut it back to the base immediately. You’ll usually get one or two more leaf harvests before the plant goes fully reproductive. Once bolting is irreversible, remove the plant, refresh the media in that planting spot, and transplant a new seedling. A staggered planting schedule — starting new seedlings every 2–3 weeks — ensures a near-continuous harvest without any single week overwhelming you with produce or leaving the grow bed underutilised.
What Are the Most Common Arugula Aquaponics Problems — and How Do You Fix Them?
Most problems in an arugula aquaponics system trace back to one of four variables: water temperature, pH, nitrogen levels, or light. The table below covers the symptoms you’re most likely to encounter and the specific fix for each.
| Symptom | Most Likely Cause | Fix |
|---|---|---|
| Bolting (central stalk elongating early) | Water temp above 75°F; lights running without a dark period; plant too mature | Cool the tank; enforce 8–10 hours darkness daily; harvest frequently; switch to bolt-resistant varieties (‘Astro’, ‘Sylvetta’) |
| Yellowing leaves (general) | Low nitrate; pH below 6.0 locking out micronutrients | Test nitrate and pH first; increase fish feeding if nitrate is below 20 ppm; raise pH if below 6.0 |
| Yellow leaves with green veins (interveinal chlorosis) | Iron deficiency — common when pH drifts above 7.0 | Bring pH back to 6.0–6.8; add chelated iron supplement if deficiency persists after pH correction |
| Pale, leggy, elongated growth | Insufficient light intensity or duration | Move grow light closer to the canopy; extend photoperiod to 16 hours/day |
| Poor germination or seedling damping off | Temperature below 60°F at germination; waterlogged rockwool | Warm the germination area; ensure rockwool is moist but not saturated |
| Fish gasping at the surface | Dissolved oxygen too low; ammonia spike | Increase surface agitation; test ammonia immediately; stop feeding temporarily |
| Persistently cloudy water | Overfeeding; mechanical filter clogged; algae bloom on tank glass | 25% water change; clean or replace mechanical filter; reduce light hitting the tank water directly |
Most of these issues resolve quickly once the underlying cause is corrected. The cycling period — typically 4–6 weeks for a new system — is when they appear most frequently. After that, a well-balanced system with the right fish, stable temperature, and consistent testing becomes largely self-regulating. If you’re still at the planning stage and thinking about overall budget, understanding what an aquaponics system realistically costs to build will help you design a setup that’s financially sustainable from the start.
How Can You Scale Up Once Your Starter System Is Running?
Once your 20-gallon system is cycling reliably and delivering consistent harvests, the most cost-effective path to higher production is an IBC tote system. A standard 275-gallon IBC tote, cut into a combined tank-and-grow-bed configuration, gives you roughly 10 times the plant capacity of a 20-gallon starter setup at a fraction of the per-litre cost of an aquarium. Building a complete IBC tote aquaponics system for under $200 is a realistic target if you source the tote second-hand — food-grade intermediate bulk containers are widely available through agricultural and industrial resellers in most regions.
At larger scale you may also consider moving from a media bed to a floating raft (deep water culture) system for your leafy greens. Floating rafts scale cleanly — you add raft surface area without proportionally increasing water volume, and arugula’s shallow root system adapts well to DWC conditions. The fish tank, pump, and filtration remain the same; you’re expanding the plant-growing side of the equation. The principles that make a 20-gallon system work — cool water, goldfish or similar fish, pH 6.0–6.8, TAN below 1 ppm — apply at any scale. The margin for error simply gets smaller as the plant load grows, which is why building good monitoring habits on the small system first matters.
Frequently Asked Questions
Can you grow arugula hydroponically?
Yes. Arugula thrives in hydroponic systems including nutrient film technique (NFT), deep water culture (DWC), and kratky setups. In pure hydroponics, pH can go as low as 5.5 because nutrients are supplied directly in solution and the system doesn’t rely on nitrifying bacteria. In aquaponics, the pH floor is 6.0 — bacteria need this minimum to process ammonia efficiently. Drop below it and ammonia begins to accumulate to levels harmful for fish. Both methods produce excellent arugula; aquaponics adds fish management complexity but eliminates purchased nutrient solutions once the nitrogen cycle is running.
What fish can you use with arugula in an aquaponics system?
Goldfish are the top choice for a beginner arugula system — hardy, tolerant of 60–75°F, and consistent waste producers. Sunfish (bluegill) are a solid alternative in the same temperature band. Rainbow trout work well in cooler setups (50–65°F) for growers who want an edible production species. Avoid tilapia: their preferred 76–84°F range is above the threshold where arugula bolts. Also avoid small ornamental fish like guppies or platies — they produce too little waste to sustain meaningful plant growth at any scale.
How long does arugula take to grow in aquaponics?
From transplant to first harvest is approximately 35–40 days under good conditions: water at 65–72°F, 14–16 hours of light daily, pH 6.0–6.8, nitrate 20–80 ppm. After a cut-and-come-again harvest, allow 2–3 weeks for leaves to regenerate to harvestable size. A 7–10 day regrowth turnaround is sometimes cited but is not achievable under normal aquaponics conditions — planning around it leads to over-harvesting and plant decline.
What is the ideal water temperature for arugula in aquaponics?
65–72°F (18–22°C). Arugula can handle brief dips to around 60°F without serious damage, but temperatures above 75°F reliably trigger bolting. This rules out tilapia as a practical fish partner for arugula and makes cool-tolerant species — goldfish, sunfish, rainbow trout — the appropriate choices. Running the system in the 65–72°F window is the single biggest factor in maintaining a productive, non-bolting arugula crop over time.
Will arugula regrow after cutting in an aquaponics system?
Yes. Arugula is a reliable cut-and-come-again crop. Harvest outer leaves only, leave the central growing tip and at least half the plant mass intact, and the plant will regenerate. Allow 2–3 weeks for new growth to reach harvestable size. Consistent outer-leaf harvesting also helps delay bolting by preventing the plant from accumulating enough energy to flower. Once you see the central stem elongating, cut it back immediately — you’ll typically get one or two more leaf harvests before the plant bolts fully.
Why does my arugula keep bolting in my aquaponics system?
Bolting is almost always caused by water temperature above 75°F, an insufficient dark period, or both. Check water temperature first — even brief daily spikes above 75°F, sustained over several days, are enough to push arugula toward flowering. Verify that your light timer is enforcing 8–10 hours of darkness every day. If temperature is the primary culprit and you can’t cool the system, switch to a bolt-resistant variety like ‘Astro’ or ‘Sylvetta’ and consider a small aquarium chiller if your environment consistently runs warm.
Getting Started: Your Arugula Aquaponics Timeline for 2026
Arugula rewards growers who get the fundamentals right and gives fast, visible feedback when something is off. The bolting or yellowing you’ll see in a poorly calibrated system isn’t a failure — it’s clear, quick information that one specific variable needs correcting. That makes arugula an excellent learning crop, and once you’ve dialled in temperature, chemistry, and fish balance, the system largely takes care of itself.
- Weeks 1–2: Assemble your 20-gallon tank and 10-gallon grow bed. Fill with dechlorinated water, install your 100–150 GPH pump, add clay pebbles to 6–8 inches depth. Begin the nitrogen cycle with fish or a measured ammonia source.
- Weeks 2–4: Add 4–6 goldfish. Test pH (target 6.0–6.8), TAN (target <1 ppm), and nitrite (target <1 ppm) every two days. The cycle is complete when ammonia and nitrite stay near zero and nitrate reads 20+ ppm consistently.
- Weeks 4–5: Sow arugula seeds in rockwool cubes at 65–75°F. Transplant seedlings to the grow bed when they are 1 inch tall with emerging roots.
- Weeks 5–10: Monitor daily (temperature, fish behaviour, leaf colour and shape). Test water chemistry twice weekly. First harvest arrives approximately 35–40 days after transplant.
- Ongoing: Harvest outer leaves every 2–3 weeks. Start new seedlings every 2–3 weeks for continuous production. When you’re ready to scale, an IBC tote system is the most cost-effective next step.
Get the temperature right, choose fish that match arugula’s cool-water needs, keep your chemistry in range, and give the plants 14–16 hours of light with a proper dark period. Those four things, maintained consistently, are what separate a productive arugula aquaponics system from a frustrating one.