I grow basil in aquaponics and I think it’s one of the most satisfying crops—compact, fast, and flavorful. It’s like tuning a piano: water, fish, and pruning must all harmonize. Maybe it’s simple, maybe not; I’ll try to explain, or rather, I will explain—please bear with me. In my experience, variety choice and nip-and-tuck pruning make the biggest difference, so let’s start with that…
Understanding Basil Varieties for Aquaponics
I favor Genovese for its Genovese potency—it’s a workhorse, high biomass and rich chlorophyll that loves summer.
Regular pH monitoring pH monitoring helps ensure nutrient availability in your aquaponics system.
Lemon basil brings a bright Lemon aroma and does well in warmer systems; it lifts a crop like sunshine.
Thai, Purple and Holy each add something—Thai is robust, Purple offers color, Holy brings resilience.
In my experience, picking high-yield, fast-growing types makes harvests predictable.
Well, maybe that’s obvious, but it’s worth saying.
I’m not entirely sure, but mixing varieties can spread risk and aesthetics; you get more reliable production and, frankly, a nicer-looking raft of plants.
Sometimes I overthink it, but trialing small batches tells you what works best.
Nutritional Benefits and Culinary Uses of Basil
Picking the right basil variety isn’t just about looks and yield; it also shapes what you get on the plate and in your body.
Choosing the right basil variety changes more than appearance — it shapes flavor, aroma, and nutrition
I love that basil packs vitamins A, K and C plus calcium, magnesium and potassium — it’s a small nutrient bomb.
Its antioxidants, flavonoids and polyphenols fight oxidative stress and curb inflammation; I think that’s why people praise basil medicinal properties.
Flavor varies a lot.
Sweet Genovese sings in pesto; Thai bursts citrus and spice.
Basil flavor profiles influence dishes—salads, pasta, soups—like seasoning with sunlight.
Harvesting timing and pruning change intensity, so you get more aroma if you cut early.
I’m not entirely sure, but maybe those essential oils, eugenol and linalool, do more than just smell nice. I think.
Regular monitoring of water quality and nutrient levels ensures basil thrives in aquaponics systems, reflecting the importance of water quality.
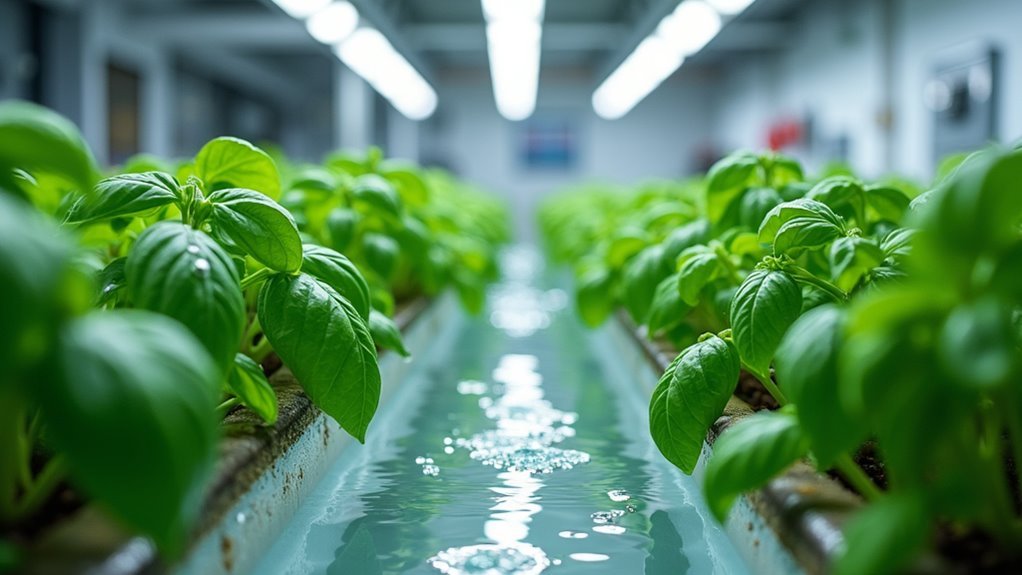
Core Components of an Aquaponics System for Herbs
Although it might sound technical at first, an aquaponics system for herbs is really just a tidy loop of a few essential parts that have to play nicely together.
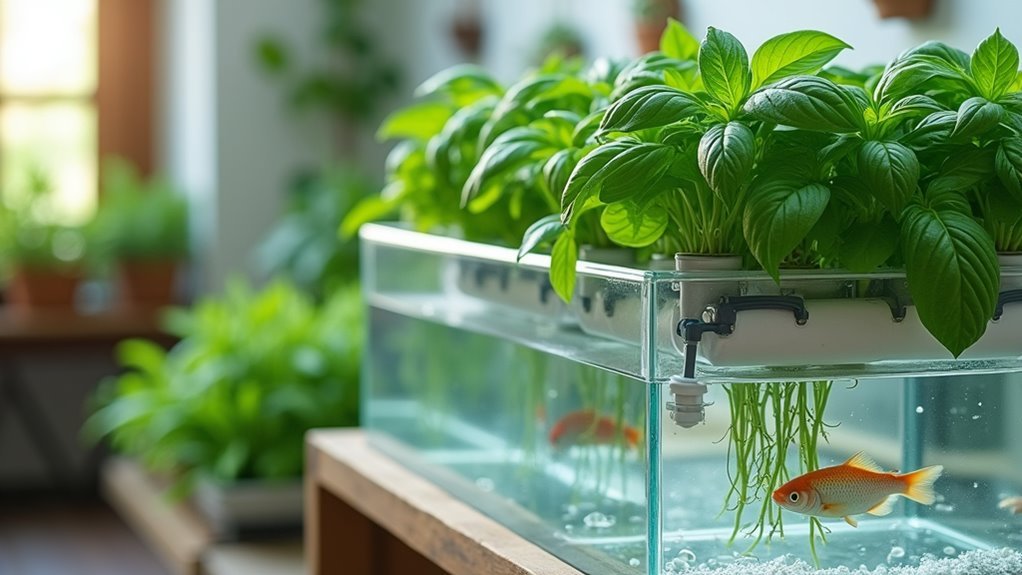
I like to think of it as a small ecosystem: a fish tank, a grow bed filled with gravel or clay pellets, a water pump, a biofilter and simple Water circulation plumbing.
The fish tank gives nutrient-rich waste; the biofilter turns ammonia into nitrates plants can use.
Keep media like expanded clay in the grow bed so roots have support.
Watch for Aquaponics algae, though — it shows imbalances and can clog pumps.
In my experience, clean design and steady maintenance are the keys.
It’s simple, honest work.
You’ll learn to tune it, really soon.
Regular system cycling helps stabilize the nutrient cycle and prevent imbalances in pH and ammonia system cycling.
Choosing Fish and Matching Environmental Conditions
When I pick fish for my basil system I usually lean toward tilapia, trout, or even goldfish, since they’re reliable nutrient sources. But you’ve got to match the species to your local climate.
Temperature and pH are non‑negotiable—keeping water around 65–85°F and stable pH keeps fish healthy and basil roots happy. Or at least that’s what I’ve found, maybe I’m biased.
And you can’t just cram in fish; balancing stocking density with flow rates and nutrient demand is like tuning an engine—get it wrong and the whole system sputters.
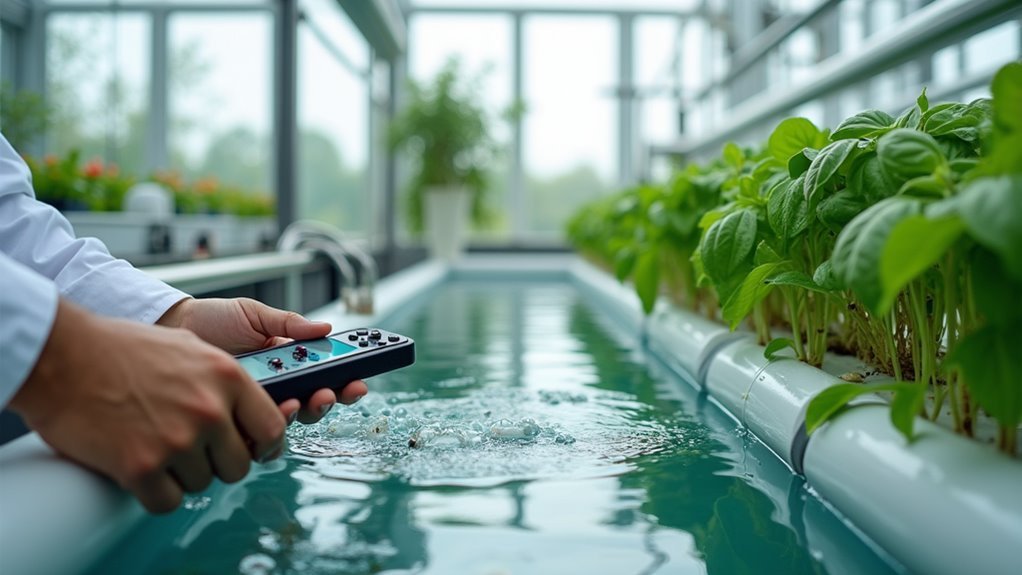
Regular water testing helps maintain stable conditions for both fish and basil, preventing stress and nutrient imbalances pH balance.
Fish Species Selection
Why does fish choice matter so much? I ask because picking the right fish species and matching water temperature is like matchmaking for your system. I prefer tilapia for warm setups; they thrive at 75–85°F and basil likes that too. Goldfish suit cooler systems, 65–75°F. Trout need colder 50–60°F—probably needing chillers. Oxygen at 8–9 ppm is essential; don’t skimp. Match fish to conditions and nutrients flow naturally.
| Fish | Temp (°F) | Notes |
|---|---|---|
| Tilapia | 75–85 | Best for basil |
| Goldfish | 65–75 | Cooler climates |
| Trout | 50–60 | Needs cooling |
In my experience, matching fish species to environment prevents headaches and boosts basil yields. I’m not entirely sure, but it feels like getting temperature and oxygen right is half the battle, seriously honestly.
Temperature and Ph Matching
You’ve already seen how picking fish is basically matchmaking. I’d add that getting temperature and pH to play nice is the other half of that relationship.
I aim for 65°F–85°F (18–29°C) because basil likes that and so do tilapia — trout too if you’re cooler, but don’t mix extremes. Keep pH between 6.0 and 7.0; it’s — no, it’s key for nutrient availability and fish health.
I use aquaponics temperature regulation and simple pH adjustment techniques, shading or insulating tanks when temps swing. Matching conditions reduces disease risk and boosts nutrient uptake.
My checklist:
- Choose compatible fish species.
- Stabilize temps and pH.
- Shade/insulate during extremes.
I’m not entirely sure, but results improve noticeably. I think it’s straightforward, maybe obvious, but it works.
Stocking Density and Flow
Because getting stocking density and flow right is basically the nervous system of an aquaponics setup, I always start there — it’s where basil and fish either thrive or argue.
I pick species like tilapia, trout or even goldfish based on the 65°F–85°F comfort zone; they tip the nutrient balance.
I aim for about 10 to 12 kg of fish per cubic meter — that fish density usually gives steady waste without collapse.
Match that to water flow, roughly 1 to 2 liters per minute per liter of fish, and you’ve got circulation that feeds roots and keeps things from stagnating.
Keep pH 6.0–7.0 and DO above 5 ppm.
I check and tweak often; trust but verify, right? Oops. I mean, verify regularly, really.
Designing Grow Beds and Media Options for Basil
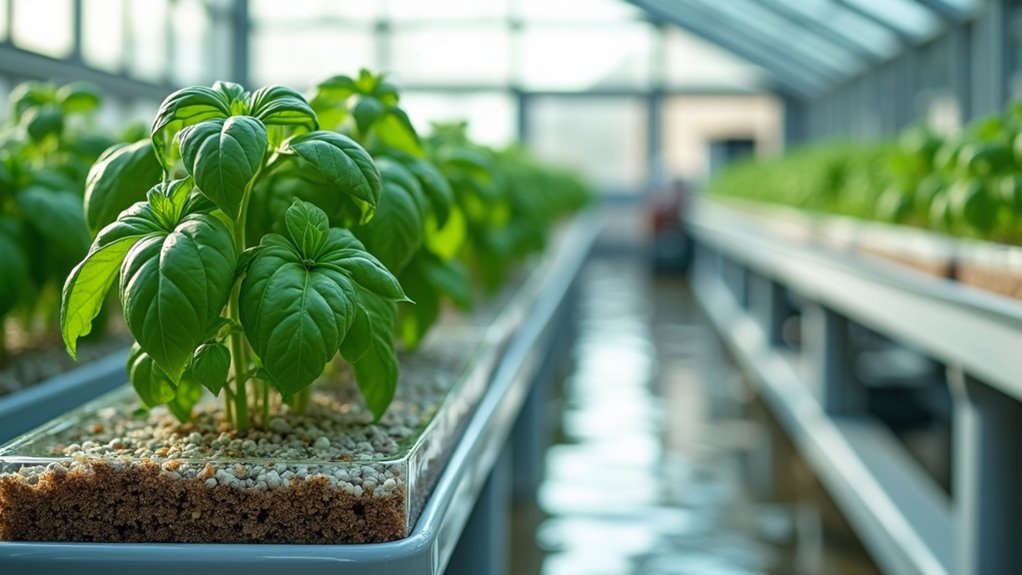
Although there’s no one perfect recipe, I think designing basil grow beds comes down to giving roots a comfy mattress — not too dense, not too soggy. I pick grow bed materials like clay pellets, gravel or lava rock because they balance aeration and water retention; perlite works too for mixes.
Regular checks on water quality are essential in aquaponics to support nutrient uptake for basil roots water quality and ensure consistent growth.
Media depth around 10 to 15 cm is my-go-to for basil roots, shallow but supportive. In raft systems you use foam or polystyrene to hold net pots while water circulates below.
I’m not entirely sure, but I find arrangement affects pH, oxygenation and nutrient uptake—so pay attention.
Quick checklist:
- Choose media for aeration and retention.
- Aim for 10 to 15 cm media depth.
- Keep flow and oxygen consistent. now
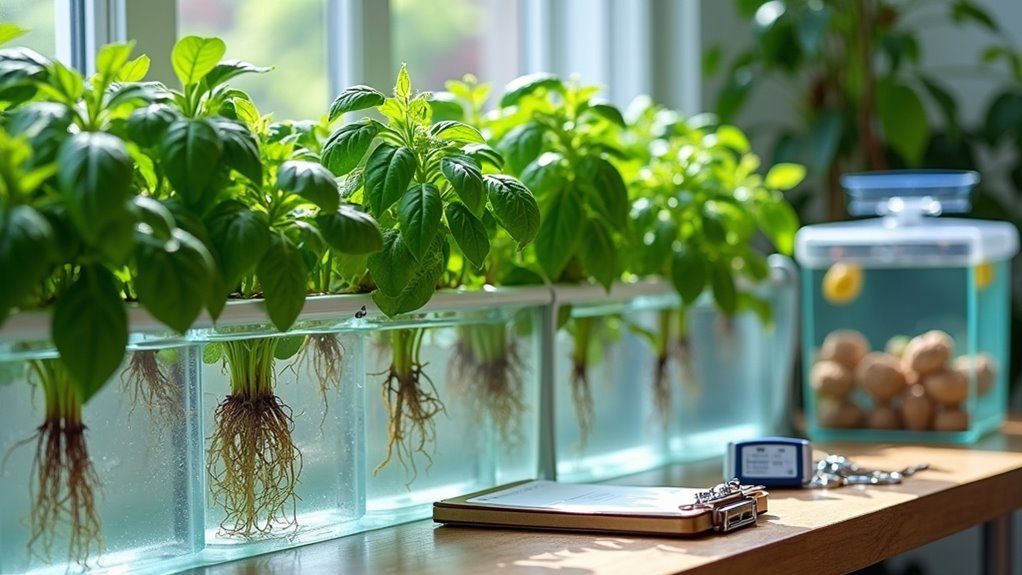
Seed Starting and Transplanting Into Water Culture
When starting basil seeds indoors, I like to treat it like tucking babies into little beds—gentle, consistent, and not too deep—so I sow them about 1/2 cm deep in coco coir, rockwool, or a seed-starting mix and keep the medium evenly moist at around 68–77°F (20–25°C) for quick germination in 5–10 days.
I tuck basil seeds gently about ½ cm deep, keeping them evenly moist and warm
As you move to NFT or DWC, maintaining stable pH balance is essential for healthy transplants.
I watch seed tray moisture closely; too wet and they drown, too dry and they stall.
Once seedlings have 4–5 true leaves and sturdy roots, I move them to NFT or DWC. I gently free roots from the plug, supporting them, and set plants into net pots with clay pellets.
I’m careful to minimize transplant shock — slow progression, stable pH (6.0–7.0), good light — and it usually works every time, honestly.
Pruning, Harvesting and Techniques to Maximize Yield
I’ve found that pinching and topping basil early makes the plants bushier and gives you more leaves — it’s like shaping a little green tree, really.
I usually stagger harvests, picking top leaves every few days so the crop keeps producing, and it’s surprisingly easy to plan, well, once you get the rhythm.
By optimizing light and plant density to boost photosynthesis, you encourage CO2 uptake and help stabilize pH over time photosynthesis.
Maybe I’m not entirely sure of the exact timing for every variety, but if you cut about a quarter inch above a node and snip off flower buds before they open you’ll boost yield and flavor — oops, that sounded formal, but you get the idea.
Pinching and Topping
How do you turn a leggy basil stalk into a bushy, productive plant? I pinch just above a leaf node — simple. In my experience, pinching techniques and topping methods force side shoots, making plants denser and more aromatic. I use clean, sharp scissors or fingers; it’s less stressful to the plant.
Harvest from the top to encourage tender new growth. Removing flowering stems early delays bolting and keeps flavor longer. Maybe I’m picky, but I tidy plants weekly. Here’s what I focus on:
- Cut above nodes to stimulate branching.
- Remove flower stems early to preserve leaves.
- Use sterile tools, small cuts, gentle handling.
I think it’s like pruning hair: a little trim gives fuller results, honestly. Try it, you’ll love it.
Staggered Harvest Scheduling
After pinching and topping to make a plant bushier, I set up a staggered harvest schedule so I’m not stripping everything at once and leaving sad, leggy stems behind. I prune regularly, cutting about 1/4 inch above nodes to trigger multiple shoots. It’s like coaxing the plant to keep giving.
I harvest early mornings to preserve aroma and oils, which actually makes subsequent cuts tastier. I remove flowering tips to avoid bitterness and redirect energy to leaves.
Two to three harvests per season works well for me, though maybe you’ll adjust. I keep an eye on root zone management and Light exposure so growth stays vigorous.
It’s simple, predictable, and kinda satisfying—well, mostly satisfying; maybe addictive, honestly. I think you’ll love the steady yields.
Monitoring Water Quality and Nutrient Management
When you’re running an aquaponic basil setup, I think of water quality as babysitting a picky toddler—get one thing wrong and everything else throws a tantrum. I check parameters daily: Water testing for ammonia, nitrates, and phosphates tells me if the system’s nutrients are balanced, and pH balancing around 6.0–7.0 is non-negotiable. The dissolved oxygen should sit near 8–9 ppm; I use aeration and filtration to keep it there. Temperature between 65°F and 85°F keeps both fish and basil happy.
That nutrient loop, a closed-loop system, relies on bacteria converting fish waste into plant-available nutrients, keeping the system balanced.
Simple routine, really—it’s not complicated. I like to remember three priorities:
- Test regularly.
- Maintain aeration/filtration.
- Adjust pH slowly.
Maybe I’m picky, but consistent checks prevent problems before they ruin a crop. You don’t want surprises—well, unless you do. Trust me, it helps.
Natural Pest and Disease Control for Basil (Aphids and More)
When I check my basil I’m always looking for aphids — tiny pear-shaped green, black or brown bugs clustered on new growth and the undersides of leaves.
If you see sticky honeydew or curled leaves it’s usually them.
I try to handle infestations naturally by releasing ladybugs or predatory mites, using neem oil or insecticidal soap, and planting marigolds or garlic nearby to keep pests away.
Well, I’m not entirely perfect at timing inspections — no, I mean I sometimes miss a spot, so regular checks and good airflow are key to stopping problems before they get out of hand.
A proactive approach to pest management can be complemented by maintaining worm-friendly conditions to boost nutrient cycling and vermicompost quality for basil health vermicompost benefits.
Aphid Identification
Although they’re tiny, aphids can be impossible to miss once you know what to look for. I always check the undersides of basil leaves first because these soft-bodied pests — green, black, or yellow — tend to cluster there and cause leaves to curl or yellow.
I look for sticky honeydew, distorted growth, and tiny pear-shaped bodies. Aphid lifecycle matters; some reproduce rapidly without mating, so infestations can explode overnight — it’s scary, honestly. I think visual checks are the best early warning.
Here are the key signs I watch for:
- Clusters on leaf undersides.
- Sticky residue and ants farming them.
- Curling or yellowing leaves and stunted shoots.
Biological control is worth learning about, though I’ll save methods for next; knowing stages helps timing.
Natural Control Methods
I prefer to tackle pest problems naturally on my basil rather than reach for sprays at the first sign of trouble; it feels more like coaching the plants than waging war. I introduce beneficial insects like ladybugs and lacewing larvae — they’re surprisingly efficient and kind of satisfying to watch.
I also use organic sprays such as neem oil or insecticidal soap, and sometimes garlic extract, safe for my aquaponic setup. I check undersides of leaves regularly; early finds are everything.
Companion plants like marigolds and chives help, too. I avoid overwatering, improve airflow, and remove affected leaves.
It’s simple, really—nature nudges things back into balance, it tries. Maybe it’s not perfect, but it works for me. I think patience and observation beat panic.
Optimizing Flavor, Storage and Market Opportunities
Because flavor‘s the thing people notice first, I pay close attention to timing, variety and handling so the basil you sell actually tastes like the dream on the menu.
I harvest early in the morning, prune often, and pick Genovese or Lemon basil for distinct profiles — it’s simple but it works.
For Flavor enhancement and market branding I focus on essential oil retention through gentle rinsing, cold storage and airtight packing; these steps keep aroma high.
I think there are three key practices:
- Harvest AM, prune regularly.
- Post-harvest rinse + chill fast.
- Brand as local/organic, target urban chefs.
Storage extends freshness and opens premium channels. Maybe it’s small tweaks, but they pay, seriously.
I’m not entirely sure, but you’ll probably see returns quickly, honestly.
Placement should maximize sunlight exposure for optimal plant health sunlight exposure.
Frequently Asked Questions
How to Grow Basil in Aquaponics?
Grow basil in aquaponics by selecting robust varieties, ensuring strong root development, transplanting to net pots, maintaining pH optimization around 6.5, pruning regularly, monitoring nutrients and pests; I’ll guide you through steps with simple tips.
What Is the Best Liquid Fertilizer for Basil?
70% of growers prefer fish emulsion; I recommend a diluted fish emulsion blend as the best liquid fertilizer for basil, since it minimizes soil dependency, aids pH balancing, reliably supplies micronutrients, and won’t harm fish.
What Herbs Are Good for Aquaponics?
Good herbs include basil, mint, parsley, cilantro, oregano; I’ll help you choose by explaining herb flavor profiles and companion planting strategies, since these affect growth, harvest frequency, market value, and nutrient needs in aquaponics efficiently.
What Is the Most Efficient Aquaponic System?
NFT nails notable aquaponic system efficiency; I recommend it for leafy herbs because its thin film boosts oxygen and flow. I’ll also stress Renewable energy integration to cut costs and stabilize system performance over DWC.